

应波大之邀分享一篇 微信公众号扫码登录网站的功能。
本次分享的技术方案是纯微信带参二维码的使用,并非微信平台自带的 微信网页开发 /网页授权 功能。
服务号必须通过微信认证的。开发测试使用测试号:https://mp.weixin.qq.com/debug/cgi-bin/sandboxinfo
好了,废话不多说上码!
本次分享还是使用 jfinal_demo 做一个演示流程!
下载jfinal_demo不用再说了 https://jfinal.com/download/now?file=jfinal_demo_for_maven-5.0.0.zip
直接上改动部分:
1、添加微信 SDK 依赖:
<!-- 微信公众号SDK -->
<dependency>
    <groupId>com.jfinal</groupId>
    <artifactId>jfinal-weixin</artifactId>
    <version>3.4</version>
</dependency>
<!-- JSON 工具可以使用其他的,这里先放fastjson -->
<dependency>
    <groupId>com.alibaba</groupId>
    <artifactId>fastjson</artifactId>
    <version>1.2.83</version>
</dependency>
2、创建一个 Account 表:账户密码啥的字段就先不加了,主要是模拟微信openId的使用:
CREATE TABLE `account` (
  `id` int(11) NOT NULL AUTO_INCREMENT,
  `name` varchar(255) DEFAULT NULL,
  `openId` varchar(50) DEFAULT NULL,
  PRIMARY KEY (`id`)
) ENGINE=InnoDB AUTO_INCREMENT=3 DEFAULT CHARSET=utf8mb4;
再执行 _JFinalDemoGenerator 工具,生成 Account 类
3、增加一个用户登录拦截器
package com.demo.index;

import com.demo.common.model.Account;
import com.jfinal.aop.Interceptor;
import com.jfinal.aop.Invocation;
import com.jfinal.core.Controller;

import java.util.Map;
import java.util.concurrent.ConcurrentHashMap;

/**
 * 用户登录拦截器
 */
public class LogonAccountInterceptor implements Interceptor {
    public static final String KEY_LOGON_TOKEN = "logon_token";
    // 测试代码 使用 map 当登录用户缓存,大家一般使用 CacheKit 之类的缓存来处理
    private static final Map<String, Account> logonAccountCache = new ConcurrentHashMap<>();

    @Override
    public void intercept(Invocation inv) {
        Account logonAccount = get(inv.getController());
        if (logonAccount != null){
            inv.invoke();
        }else{
            // frp代理的原因未能识别域名,这里测试先写死
            String base = "http://dfz.a.myedu.top";
            inv.getController().redirect(base + "/weixin/api/logonOAuth");
        }
    }
    public static void put(String token, Account logonAccount){
        logonAccountCache.put(token, logonAccount);
    }

    public static Account get(Controller c) {
        String token = c.getCookie(KEY_LOGON_TOKEN);
        if (token == null) return null;
        return logonAccountCache.get(token);

        // 虚拟一个登录用户信息 用于测试
//        Account logonAccount = Account.temp;
//        if (logonAccount == null){
//            logonAccount = Account.dao.findById(1);
//            if (logonAccount == null){
//                logonAccount = new Account();
//                logonAccount.setId(1);
//                logonAccount.setName("dufuzhong");
//                logonAccount.save();
//            }
//            Account.temp = logonAccount;
//        }
//        return logonAccount;
    }

}
上面代码 使用 map 当登录用户缓存,大家一般都是使用 CacheKit 之类的缓存来处理吧,这里先模拟一下,不加其他依赖了。
4、增加一个生成二维码的调用功能
package com.demo.weixin;

import com.demo.common.model.Account;
import com.demo.index.LogonAccountInterceptor;
import com.jfinal.aop.Clear;
import com.jfinal.core.Path;
import com.jfinal.kit.Ret;
import com.jfinal.kit.StrKit;
import com.jfinal.weixin.sdk.api.*;
import com.jfinal.weixin.sdk.jfinal.ApiController;

//多微信公众号需要使用ApiInterceptor
//@Before(ApiInterceptor.class)
@Path("/weixin/api")
public class WeiXinApiController extends ApiController {

    /**
     * 登录二维码网页
     * /weixin/api/logonOAuth
     */
    @Clear(LogonAccountInterceptor.class)
    public void logonOAuth(){
        String event = get("event");
        if ("showQrcodeUrl".equals(event)){
            String token = StrKit.getRandomUUID();
            setCookie("logon_token", token, -1, true);
            String sceneStr = "logonOAuth:" + token;
            ApiResult apiResult = QrcodeApi.createTemporary(30 * 15, sceneStr);
            String showQrcodeUrl = QrcodeApi.getShowQrcodeUrl(apiResult.getStr("ticket"));
            redirect(showQrcodeUrl);
            return;
        }
        if ("check".equals(event)){
            Account logonAccount = LogonAccountInterceptor.get(this);
            renderJson(logonAccount != null ? Ret.ok() : Ret.fail());
            return;
        }
        render("/weixin/login.html");
    }

    /**
     * 登录人绑定二维码
     * /weixin/api/logonAccountBindingOAuth
     */
    public void logonAccountBindingOAuth(){
        // 模拟登录人
        String event = get("event");
        Account logonAccount = Account.temp;
        if ("showQrcodeUrl".equals(event)) {
            // 推荐使用account增加一个 uuid 字段或用缓存uuid映射id做为唯一标识,这里简单使用 id 标识
            String sceneStr = "logonAccountBindingOAuth:" + logonAccount.getId();
            ApiResult apiResult = QrcodeApi.createTemporary(30 * 15, sceneStr);
            String showQrcodeUrl = QrcodeApi.getShowQrcodeUrl(apiResult.getStr("ticket"));
            redirect(showQrcodeUrl);
            return;
        }
        set("logonAccount", logonAccount);
        render("/weixin/logonAccountBindingOAuth.html");
    }


}
上面logonOAuth代码有使用Cookie。
如果是分离项目,就用json 返回token、showQrcodeUrl 值,登录拦截器通过getHeader取token即可。
5、增加两个界面 一个绑定,一个登录:

login.html
#@layout()
#define main()
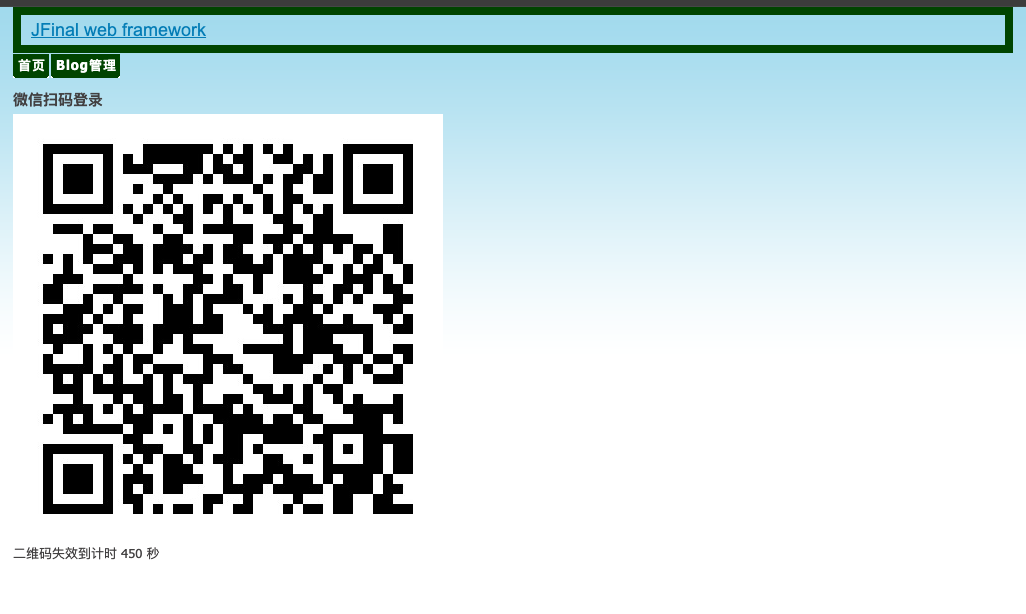
<h1>微信扫码登录</h1>
<img src="/weixin/api/logonOAuth?event=showQrcodeUrl">
<p id="msg"></p>
<script>
$(document).ready(function(){
var count = 30 * 15;
function check() {
$("#msg").html("二维码失效到计时 "+ count +" 秒");
count --;
$.getJSON("/weixin/api/logonOAuth?event=check", function(ret){
console.log(ret);
if(ret.state == "ok") {
window.location.href = '/';
}else {
setTimeout(function(){ check() }, 1000);
}
});
}
setTimeout(function(){ check() }, 3000);
});
</script>
#endlogonAccountBindingOAuth.html
#@layout()
#define main()
<h1>微信扫码绑定 #(logonAccount.name)</h1>
<img src="/weixin/api/logonAccountBindingOAuth?event=showQrcodeUrl">
#end
index.html 增加一个按钮入口吧,正常应该是有个人中心 然后有个微信绑定按钮、手机、邮箱之类的绑定。
public void index() {
    set("logonAccount", LogonAccountInterceptor.get(this));
    render("index.html");
}
省略代码... 账户微信绑定: 【#(logonAccount.openId ? '已绑定':'未绑定')】 <a href="/weixin/api/logonAccountBindingOAuth"><b>#(logonAccount.openId ? '重新绑定':'点击绑定')</b></a>
6、增加微信消息回调处理:
package com.demo.weixin;
import com.demo.common.model.Account;
import com.demo.index.LogonAccountInterceptor;
import com.jfinal.aop.Before;
import com.jfinal.aop.Clear;
import com.jfinal.core.Path;
import com.jfinal.weixin.sdk.jfinal.MsgControllerAdapter;
import com.jfinal.weixin.sdk.jfinal.MsgInterceptor;
import com.jfinal.weixin.sdk.msg.in.InTextMsg;
import com.jfinal.weixin.sdk.msg.in.event.InFollowEvent;
import com.jfinal.weixin.sdk.msg.in.event.InMenuEvent;
import com.jfinal.weixin.sdk.msg.in.event.InQrCodeEvent;
import com.jfinal.weixin.sdk.msg.out.OutTextMsg;
@SuppressWarnings("unused")
@Path("/weixin/msg")
public class WeiXinMsgController extends MsgControllerAdapter {
@Override
@Clear
@Before(MsgInterceptor.class)
public void index() {
super.index();
}
/**
* @param event 处理接收到的二维码扫描事件
*/
@Override
protected void processInQrCodeEvent(InQrCodeEvent event) {
String eventKey = event.getEventKey();
String openId = event.getFromUserName();
System.out.println("processInQrCodeEvent=" + eventKey);
String logonAccountId = getValByEventKey(eventKey, "logonAccountBindingOAuth:");
if (StrKit.notBlank(logonAccountId)){
logonAccountBindingOAuth(event, openId, logonAccountId);
return;
}
String logonToken = getValByEventKey(eventKey, "logonOAuth:");
if (StrKit.notBlank(logonToken)){
logonOAuth(event, openId, logonToken);
return;
}
OutTextMsg outMsg = new OutTextMsg(event);
outMsg.setContent("感谢您的关注!" + eventKey);
render(outMsg);
}
private String getValByEventKey(String eventKey, String key) {
if (StrKit.isBlank(eventKey)){ return null; }
if (eventKey.startsWith(key)){
return eventKey.substring(key.length());
}
String first = "qrscene_";
if (eventKey.startsWith(first)){
// 第一次扫码关注 参数会带前缀,切掉继续匹配
return getValByEventKey(eventKey.substring(first.length()), key);
}
return null;
}
private void logonOAuth(InQrCodeEvent event, String openId, String token) {
String sql = "SELECT * FROM account a WHERE a.openId = ? LIMIT 1";
Account logonAccount = Account.dao.findFirst(sql, openId);
if (logonAccount == null){
// 这个位置看自己业务, 是否需要游客模式,如果 account 没有记录,就生成一条数据,返回登录成功就可以
OutTextMsg outMsg = new OutTextMsg(event);
outMsg.setContent("登录失败");
render(outMsg);
return;
}
// 登录缓存对象
LogonAccountInterceptor.put(token, logonAccount);
OutTextMsg outMsg = new OutTextMsg(event);
outMsg.setContent("登录成功!" + logonAccount.getName());
render(outMsg);
}
private void logonAccountBindingOAuth(InQrCodeEvent event, String openId, String logonAccountId){
Account logonAccount = Account.dao.findById(logonAccountId);
if (logonAccount == null){
OutTextMsg outMsg = new OutTextMsg(event);
outMsg.setContent("绑定失败");
render(outMsg);
return;
}
logonAccount.setOpenId(openId);
logonAccount.update();
//登录人绑定二维码
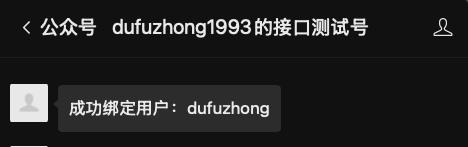
OutTextMsg outMsg = new OutTextMsg(event);
outMsg.setContent("成功绑定用户:" + logonAccount.getName());
render(outMsg);
}
@Override
protected void processInFollowEvent(InFollowEvent inFollowEvent) { }
@Override
protected void processInTextMsg(InTextMsg inTextMsg) { }
@Override
protected void processInMenuEvent(InMenuEvent inMenuEvent) { }
}通过切割eventKey事件值 进行区分 不同的扫码事件进行业务处理即可。
7、配置DemoConfig ,临时可以使用微信测试号 https://mp.weixin.qq.com/debug/cgi-bin/sandboxinfo
public void configInterceptor(Interceptors me) {
       //登录用户 拦截器
       me.add(new LogonAccountInterceptor());
}

@Override
public void onStart() {
    ApiConfig ac = new ApiConfig();
    ac.setToken("jfinal");
    ac.setAppId("xxx");
    ac.setAppSecret("xxx");
    ApiConfigKit.putApiConfig(ac);
    ApiConfigKit.setDevMode(true);
}
8、启动内网穿透和 demo演示一下吧!
我们自己有公网服务器,所以使用 frps + nignx + frpc 感觉更方便一些,域名流量啥的套餐都不限制了。
(阿里云个人主机一年 99 可以看下,再装个1panel面板https://1panel.cn,在商店一键安装frps也很简单)
如果没有自己的服务器,就使用https://natapp.cn/ 这个软件吧,附优惠码:C01EC183
PS:我有修改端口为 8080
需要先调通 内网穿透代理 访问,再测试了。不然微信消息不能回调过来。二维码加载慢是因为代理中间转的慢,正常在服务器上还是很快的。
PS:1:微信测试号地址:https://mp.weixin.qq.com/debug/cgi-bin/sandbox?t=sandbox/login

PS2:微信服务号的回调配置在获取AppSecret的下面:
配置成功时,控制台有输出成功消息

打开微信扫一扫,收到消息登录失败,是因为我还没绑定了。没有做没绑定的微信自动添加为新用户。

在登录拦截器位置先处理一下,先写死为 id 为 1 的数据(数据库中添加了 1 条,表示旧数据),上面代码有注释,放开注释并注释前面 2 行即可。
    public static Account get(Controller c) {
//        String token = c.getCookie(KEY_LOGON_TOKEN);
//        if (token == null) return null;
//        return logonAccountCache.get(token);

//         虚拟一个登录用户信息 用于测试
        Account logonAccount = Account.temp;
        if (logonAccount == null){
            logonAccount = Account.dao.findById(1);
            if (logonAccount == null){
                logonAccount = new Account();
                logonAccount.setId(1);
                logonAccount.setName("dufuzhong");
                logonAccount.save();
            }
            Account.temp = logonAccount;
        }
        return logonAccount;
    }
重启再 直接登录成功,然后再点绑定试试:


再看下数据库:

奈斯~
再去掉 拦截器写死的代码,并重启 JFinal
public static Account get(Controller c) {
    String token = c.getCookie(KEY_LOGON_TOKEN);
    if (token == null) return null;
    return logonAccountCache.get(token);
}


搞定~ 时间仓促没有过多美化内容,流程为主了